Overview
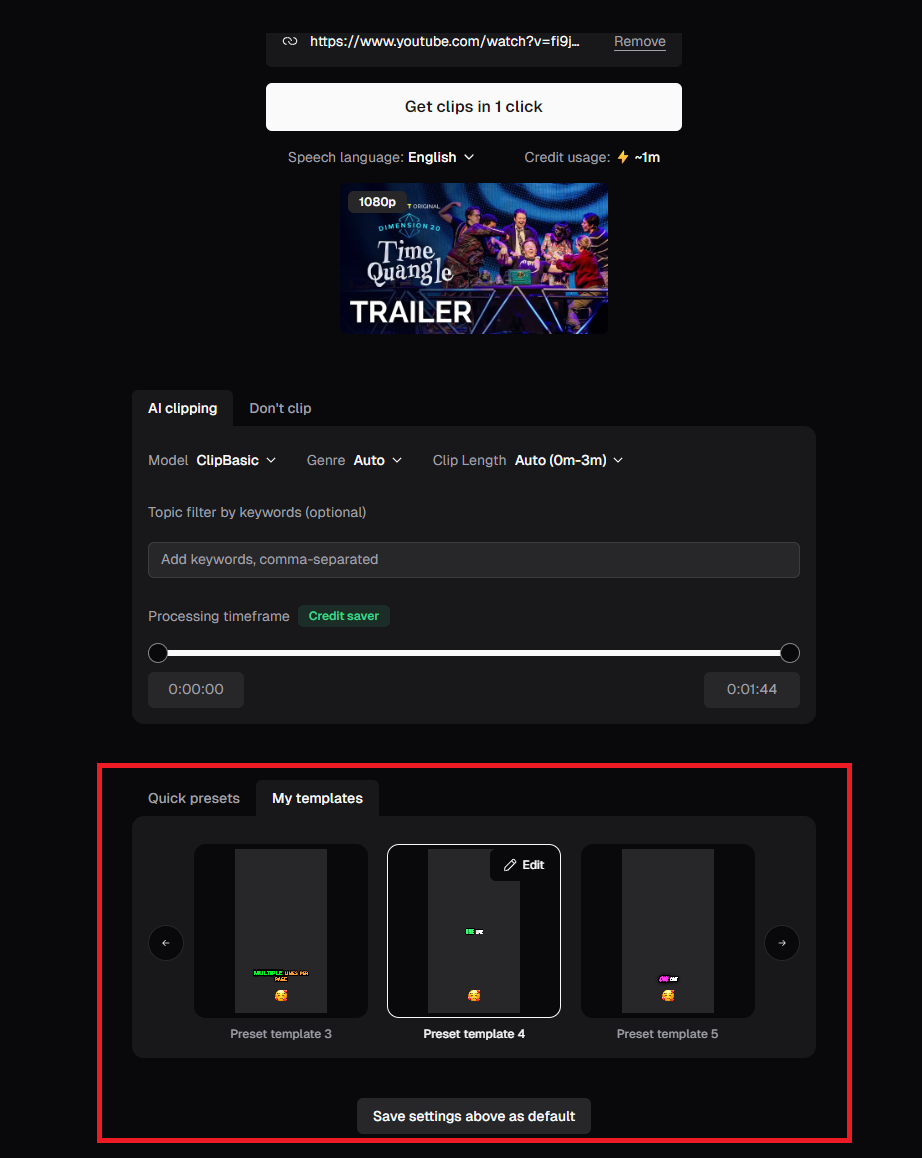
You can set up various Brand Templates with your brand color, fonts, logos, and more to make your clips on-brand and more recognizable. To set up your brand template, click Brand Template on the left side panel.
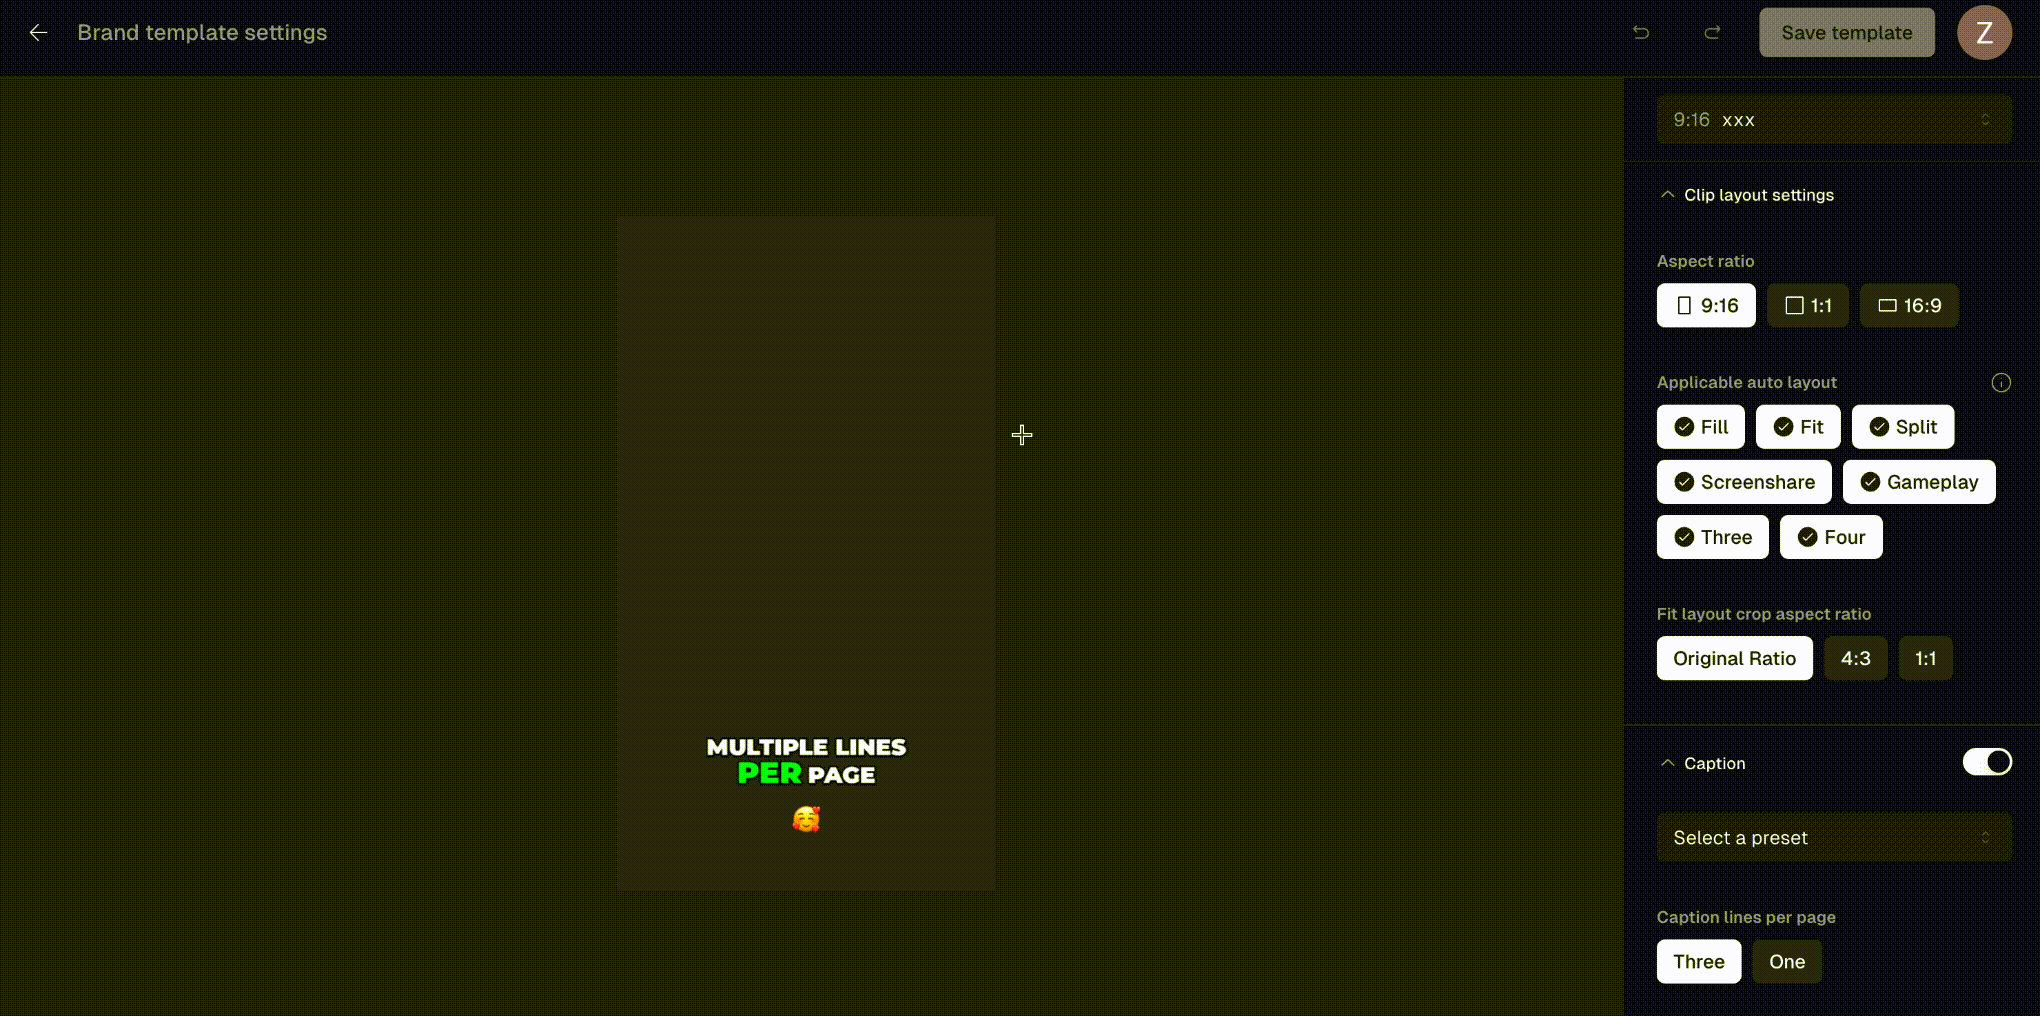
Clip Layout Settings
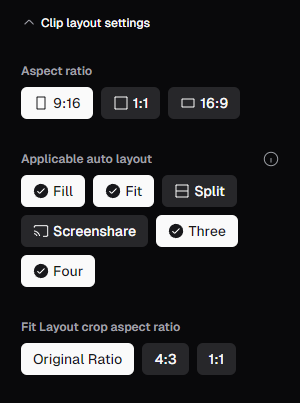
- Aspect Ratio: Brand templates allow you to preset a specific aspect ratio ahead of time and apply it to your clips with a single click. We currently offer 9:16 (Portrait), 1:1 (Square), and 16:9 (Landscape) aspect ratios.
- Auto Layout: You can default to a specific clip layout or set of layouts if you prefer a certain look and format for your clips. For example, if you normally have three speakers on screen, the Three layout would be the best default setting to apply for your brand template. When multiple options are selected, the AI will auto apply layouts based on scene detection.
- Fit Layout Crop Aspect Ratio: When Fit layout is applied, the entire video will be displayed in the clip’s frame. This setting will determine if any additional cropping will be applied to the source video when Fit layout is applied.
- Original Ratio: The video has no additional cropping applied. This is the default setting for Fit.
- 4:3: The video will be cropped into a 4:3 (Landscape) aspect ratio, with blurred bars above and below to pad out the space.
- 1:1: The video will be cropped into a 1:1 (Square) aspect ratio, with blurred bars above and below to pad out the space.
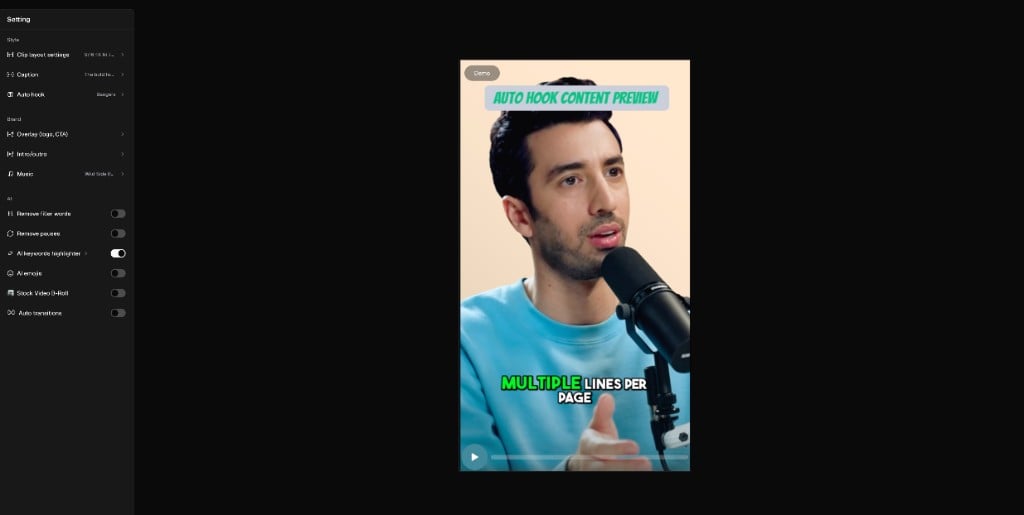
Auto Hook styling
Style your Auto Hook (the short text overlay shown in the opening seconds of a clip) once in your Brand Template and it will be applied automatically to every clip generated with that template, with no per-clip editing. In the Auto Hook section you can set:- Font
- Size
- Weight
- Font color
- Word background color
- Corner radius
- Text box width
You can enable Auto Hook from the upload flow, the editor, or your auto-import settings. Learn more in Auto Text Overlay Hook.
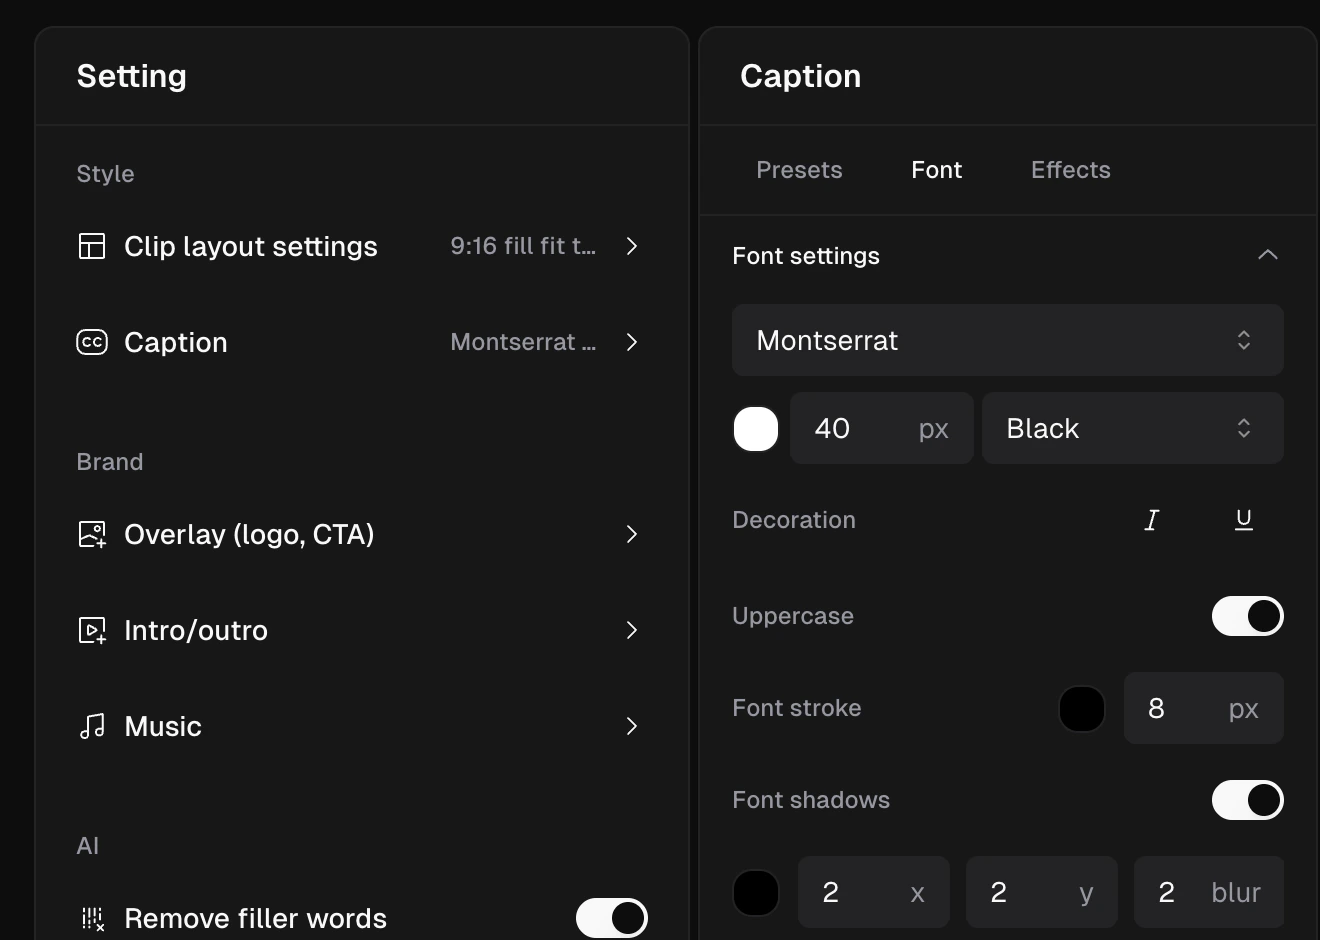
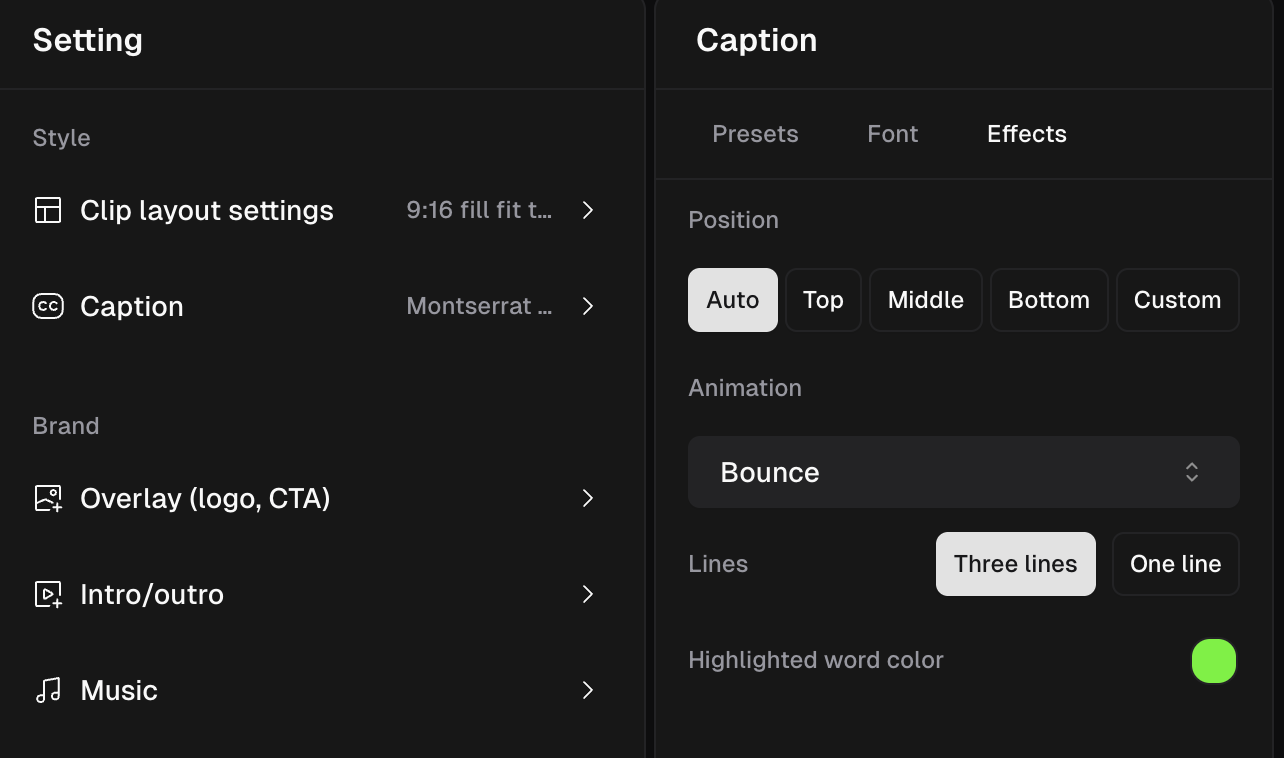
Caption
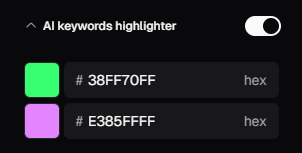
AI Keywords Highlighter
Overlay
Brand your clips and make them instantly recognizable by applying your logo or CTA (Call to Action) image to your clips! Once uploaded, your logo or CTA can be resized and placed anywhere on the canvas, enabling you to create a visually distinct clip with your brand template.PNG format is recommended for any CTAs or overlays that take up a majority of the screen so that it doesn’t fully cover the clip.
Add Intro/Outro
We only allow uploads up to 1 minute and 200MB files for Intro/Outro. If you upload more than allowed, you will see an error message.
AI Emojis
Our AI will attempt to add relevant emojis based on the captions on screen, which can add another layer of engagement and cohesiveness to your clips. The emoji position can be moved around freely on the clip canvas and toggled on and off.Auto Transitions
A stock transition from our library can be applied to your clips on scene transition, saving hours of manual editing and enabling smooth transitions from one shot to another. There are currently 6 different transitions that can be applied, and this feature can be toggled on and off as well.Save and Apply
Don’t forget to save your Brand Template once you are finished tuning it exactly to your needs by clicking Save template in the top right of the editor.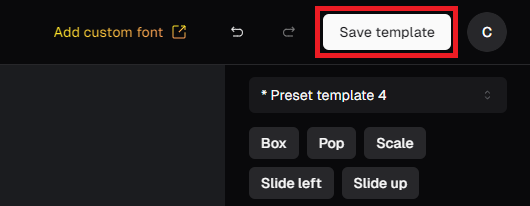
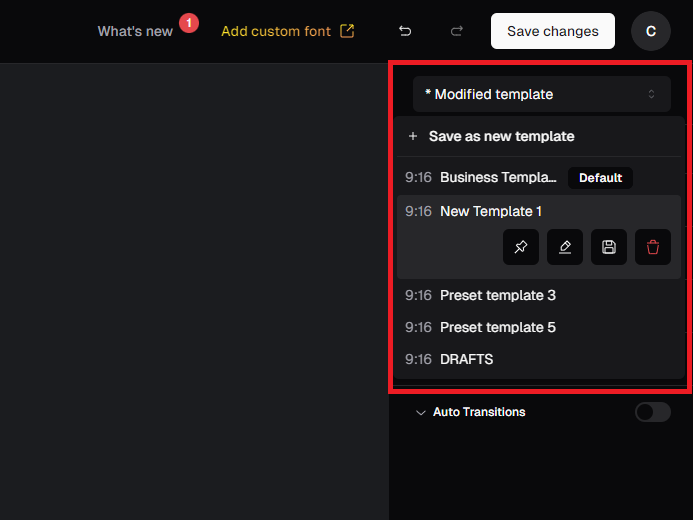
Pro Plan users now have 4 templates available (raised from 2). To get more templates, please fill out this form to learn about our enterprise plan: https://www.opus.pro/contact