
1. What is Agent Opus
Agent Opus creates videos from ideas, scripts, images and supported audio or video inputs. Use this guide to choose a mode, prepare your content, review and edit your video, and understand credit charges. You can create explainers, stories, music videos, product ads and social content. The four preset modes are Standard, Standard+, Premium and Ultra. Each supports different visual capabilities, audio options and editing tools; Choosing a mode compares them.2. Getting started
- Sign in. Open Agent Opus, create an account and log in using a one-time password.
- Start with your content. Describe an idea, paste a script or select a creation tool for your audio, video reference or assets. See Creation tools and supported inputs for supported inputs.
- Choose and customize. Set Quality, then choose your style, aspect ratio, audio and assets where available. Choosing a mode and Customizing your video explain these controls.
- Submit and review. Check the proposed plan and credit estimate before generation. Some checkpoints have an auto-confirm timer; see Auto confirm and cancellation.
- Check the result. Watch the completed video, make any needed edits using Editing and remaking your video and download the version you want to use.
 The composer is the starting point for your request and project settings.
For inspiration, browse the sample projects. Open one to view its prompt and labeled visual style, or use Remix to recreate it.
The composer is the starting point for your request and project settings.
For inspiration, browse the sample projects. Open one to view its prompt and labeled visual style, or use Remix to recreate it.
3. Choosing a mode
Open Quality in the composer and move the slider to Standard, Standard+, Premium or Ultra. Choose the mode that fits the video you want to make.
Standard and Standard+ build visuals around narration and can connect scenes with flowing transitions. Premium and Ultra build multi-shot sequences using their supported character-dialogue controls. Results vary with your prompt, references and model; check visual continuity and accuracy.
Custom options
Expand Custom below the Quality slider to see the model choices available for your mode. Open Video model or Image model and compare the descriptions before selecting an option. Choose a preset mode with Quality, or open Custom to change the available models.
Preset modes use the default generation rates in Credits pricing and refunds. Pricing varies by model when you select a custom model; its displayed rate applies.
Choose a preset mode with Quality, or open Custom to change the available models.
Preset modes use the default generation rates in Credits pricing and refunds. Pricing varies by model when you select a custom model; its displayed rate applies.
4. Creation tools and supported inputs
Choose a creation tool along the bottom of the composer. Your mode determines which features are available. A video upload can supply spoken audio, music or a visual reference; select the appropriate tool so Agent Opus uses the content you intend.Accepted audio and video formats
Audio to Video: Audio in MP3, M4A, WAV, AAC, FLAC, OGG and WEBA. Video in MP4, MOV, WebM, MKV, AVI, M4V, MPG and MPEG. The upload must contain speech; for music, use Song to Video. Song to Video: Audio in MP3, M4A, WAV, AAC, FLAC, OGG and WEBA, up to 120 MB. Video on desktop in MP4, MOV, MKV, AVI, M4V, MPG and MPEG, up to 500 MB. The mobile picker accepts audio files only. Reference to Video: Video in MP4, MOV and WebM, up to 500 MB. You can also paste a supported public video link instead of uploading a file. For other Premium or Ultra projects, use the duration options offered in the composer. Style Maker has separate reference limits, listed in Customizing your video; a style reference does not set the generated video’s length.Articles, links and documents
For an article, blog, X post or news item, paste the source text into the composer and describe the video you want. Ask Agent Opus to summarize or explain it for your audience, then review the proposed script for accuracy. Use a source-link field when a planning question offers one. Supported public video links belong in Reference to Video; other web addresses may not be importable directly. PDFs, Docs and similar documents are not accepted as files, so paste their text instead.5. Customizing your video
Set the style, aspect ratio, brand brief, audio and assets in the composer before submitting. Available controls depend on your mode.Visual styles and Style Maker
Choose a preset or saved style, or leave Style on Auto to receive proposals during planning. To create a custom style, open Style and select Add style. Check any plan requirement indicated by the crown badge.- Add your references and adjust the Describe style text, then select Generate.
- Review the proposed style description, color palette and three scene previews. Use chat to request a change, such as “warmer colors,” or edit the palette’s hex codes and add colors.
 Style Maker shows a description, palette and scene previews before you save the style.
- Saving the palette or requesting a change generates fresh previews. Once satisfied, select Save style to add it to your library.
- Use History to compare saved iterations and restore an earlier version. The pencil on a saved style reopens it for editing; the cross deletes it.
Aspect ratio
Use the aspect ratio control before submission. 9:16 is the default for vertical videos such as Reels, Shorts and TikTok. Choose 16:9 for landscape video or 1:1 for square posts.Voiceover
Open Audio to set the voiceover. On Standard and Standard+ you can preview a built-in voice, clone a voice, or upload a spoken recording. On Premium and Ultra you can upload a spoken recording, but you cannot choose a built-in voice or clone one; those modes use character dialogue instead of this narration workflow. To clone a voice, upload or record a sample up to 30 seconds long. To use an existing recording as the voiceover, upload a supported audio or video file within the limits in Accepted audio and video formats. A video-upload prompt confirms that only its audio will be used.Voice cloning languages: Afrikaans, Arabic, Bulgarian, Catalan, Chinese (Mandarin), Chinese (Cantonese), Croatian, Czech, Danish, Dutch, English, Filipino, Finnish, French, German, Greek, Hebrew, Hindi, Hungarian, Indonesian, Italian, Japanese, Korean, Malay, Norwegian, Persian, Polish, Portuguese, Romanian, Russian, Slovak, Slovenian, Spanish, Swedish, Tamil, Thai, Turkish, Ukrainian and Vietnamese.
Objects, characters and logos
Open Assets to upload up to eight images in any combination of Objects, Characters and Logos. Supported formats are PNG, JPG, WebP, GIF, SVG, HEIC/HEIF, TIFF and AVIF.
Each uploaded image appears as a labeled tag, such as
[Object image 1] or [Character image 1]. Write your prompt around these tags to explain each image’s role. You can insert an existing tag by typing @, or drag the tags to reposition them; you do not need to type the labels manually.
 Upload an Object, Character or Logo, then reference its tag in your prompt.
For example, upload a product image, a spokesperson image and your logo, then write: “Show
Upload an Object, Character or Logo, then reference its tag in your prompt.
For example, upload a product image, a spokesperson image and your logo, then write: “Show [Character image 1] entering a meeting room and placing [Object image 1] on the table. End with [Logo image 1] on screen.”
Where your uploads appear. Because the whole scene is generated from your prompt, an uploaded image can appear anywhere in the story rather than being dropped on top of it. You might have your Character sitting at a desk holding your Object, with your Logo on a screen behind them. Agent Opus redraws each upload in the style you chose, so it belongs in the scene while staying recognisable.
Image references guide the generated scene. Check likeness, proportions, text and fine details in the result, especially when using a real product or person. You can also use references for stories and explainers, such as a recurring animal character or a historical figure.
6. Motion graphics with Motion Studio
Motion graphics are made in Motion Studio, a separate Opus Labs tool rather than part of the Agent Opus flow described above. Choose Motion graphics in the composer and you are taken there. It is built for short, designed pieces such as logo stings, kinetic titles and concept B-roll, not narrated story videos. For a dedicated walkthrough, see How to use Motion Studio.Setting up
Describe what happens, how it should feel and how it ends. You can attach references, up to 30 images, 10 videos and 10 audio files. Starting from a template such as Logo animation, Logo sting, Concept B-roll or Kinetic titles fills the prompt for you; edit it so it matches your project. To mention an uploaded reference in the prompt, type@ and select the file. The upload has to finish first, so wait for it to complete before you try to mention it.
The settings are Model, Style, Length, Aspect and an Audio toggle. The cost appears on the button before you commit.
 The Motion Studio composer, with settings and the cost shown on the button.
Styles
Motion Studio has its own style set, separate from the Agent Opus gallery and from Style Maker: Corporate explainer, 3D Studio, Crafted Woodland, Diffuse UI, Vertical Press, Neo-pop and Paper Cutout. Each one has a preview and a description of the look it produces. Choose No style to render your idea as-is, or upload your own style reference image. Each style has a preview and a description; you can also upload your own reference.
The shot plan
Motion Studio plans before it renders. Create shot plan returns a beat-by-beat breakdown with timecodes, plus the style, subjects, look, camera, sound and any on-screen text it intends to use. Review it, then choose Submit project to render, or Revise idea to go back and change the brief. Nothing renders until you submit. You do not have to wait on the page. Once you submit you can leave, and check Projects for progress and to open finished results. The shot plan: timecoded beats plus the look, camera, sound and on-screen text.
Your finished graphic
When it is ready you can play it, Download it, or choose Revise video to make a new version. A finished motion graphic, with Download and Revise video.
Revising
Revise video opens a dialog where you describe what should change. Your original prompt, references, preset and style stay the same, so you are adjusting the existing piece rather than starting again. A revision is quoted and charged like a new render, and the cost is shown on the button before you confirm. Describe what should change; the revision is priced before you confirm.
For the current rates, see the quality levels page and the Credits FAQ.
Describe what should change; the revision is priced before you confirm.
For the current rates, see the quality levels page and the Credits FAQ.
Motion Studio is in beta. The available models, settings and prices can change, so check the estimate shown beside the button each time rather than relying on a remembered figure.
7. Reviewing and canceling your project
After submission, Agent Opus uses your request to propose a plan. It may ask clarification questions first; a complete script or detailed brief may need fewer questions. Choose an answer, skip where offered or provide your own response. Review the available planning cards and the credit estimate before continuing. The stages differ by mode and project.Standard and Standard+ review stages
Summary covers the topic, audience, pacing, tone and requirements, with settings such as aspect ratio, length, captions and background music. Ask for changes here, including to any Must Not Violate requirements. Script shows the proposed narration and word count against the 1,700-word limit. Review Voiceover for voice, speed and pronunciation; change it from Auto-select if you want a specific voice. If Style is set to Auto, Agent Opus proposes three styles with one already selected. Choose another, use the pencil on any option to adjust it, or select View more for the gallery and your saved styles. Otherwise, review the style you chose before submission. Assets shows the images your project needs; some projects need none. To use your own Characters, Logos or Objects, add them from Assets in the composer before you submit, or ask for the change in the project chat. A Storyboard is optional. At the review bar, choose Create Storyboard for a shot plan with timings, or Create Video Now to proceed directly. The credit estimate appears beside Quality and updates when you change it. Every stage stays open until you generate. Edit a card directly, or ask for the change in the project chat; both work, and you can switch between them at any point. Agent Opus then reworks whatever depends on what you changed, so shortening the runtime reshapes the script, which in turn changes the assets and the storyboard. You do not have to visit the stages in order, or revisit each one yourself after a change. The review bar offers an optional storyboard and shows the generation estimate beside Quality.
Premium and Ultra review stages
Summary sets the visual style, storytelling approach, tone, purpose and speech. Screenplay outlines scenes, timings and speech. References provides images of recurring characters and objects. Clips generates the individual shots, and Video assembles them. Request changes in the project chat. A change to duration or story structure may also affect the screenplay, references and clips. When a card offers Confirm or Request changes, review the proposed work and the estimate before proceeding. Lettered suggested actions are shortcuts; you can also type your own request. Review the plan and credit estimate before selecting Confirm, or choose Request changes.
Auto confirm and cancellation
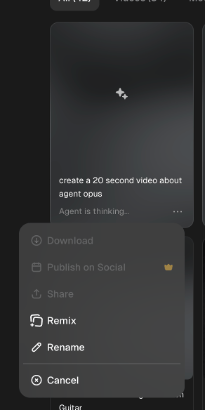
Agent Opus is set to Auto by default. It still pauses at each checkpoint and asks, but if you step away it fills in the remaining details and carries on, which starts generation and uses credits. Closing the browser tab does not stop this; your project keeps processing after you leave the page. To stop this, use the Auto control beside the chat box and choose Manual. Agent Opus then waits for your reply at every step and nothing runs on its own. Switch back to Auto whenever you want it to keep moving while you are away. You can cancel a project up until generation starts. Use Discard project in the project itself while you are still reviewing the planning cards; it deletes the project and its script, and no credits are charged. You can also cancel from your Projects list, where the project menu offers Cancel. Wait for the cancellation status to confirm it has stopped.
Once generation has started you cannot cancel it, and the project runs to completion. Closing the tab, deleting a message or discarding an editor preview does not stop it either. If a project is stuck or you think something has gone wrong, contact support with the project link using Troubleshooting and support.
You can cancel a project up until generation starts. Use Discard project in the project itself while you are still reviewing the planning cards; it deletes the project and its script, and no credits are charged. You can also cancel from your Projects list, where the project menu offers Cancel. Wait for the cancellation status to confirm it has stopped.
Once generation has started you cannot cancel it, and the project runs to completion. Closing the tab, deleting a message or discarding an editor preview does not stop it either. If a project is stuck or you think something has gone wrong, contact support with the project link using Troubleshooting and support.

8. Editing and remaking your video
Use the editing workflow for your mode. Standard and Standard+ have a timeline editor; Premium and Ultra use project chat. To create a new version with a different overall look, use Reimagine where available. Editing charges are explained in Credits, pricing and refunds.Standard and Standard+
Before your first edit
AI editing is experimental. The first time you edit a video, you are asked to confirm that edits may contain errors or may not match your request exactly. Select Got it to continue. You only see this once per project.Requesting an edit
- Open a finished video and click its change box. Use Screenshot to identify a moment or Timestamp to select a point on the timeline.
- Adjust the selected range by dragging either end. Describe the visual change you want, including any object or area to change. Use + to attach a reference image, then check the edit estimate before generating.
 The prompt bar combines a Timestamp, reference-image attachment and credit estimate.
Reviewing and applying an edit
The editor generates a preview beside the original. Review the affected range and select Apply to video to use it, or New preview to request another generation. Cancel discards the preview; it does not reverse a completed generation charge. Compare the preview with the original before applying the edit.
After applying, wait for the updated video to finish rendering and check the latest completed version before downloading. Open Show history to review saved edits and select an available earlier version to continue from.
Compare the preview with the original before applying the edit.
After applying, wait for the updated video to finish rendering and check the latest completed version before downloading. Open Show history to review saved edits and select an available earlier version to continue from.
 Show history lets you review saved edit versions after applying a change.
If an edit doesn’t match your request
Agent Opus checks each edit against what you asked for. If it doesn’t match, you still see the result and can choose Try again, free or Leave it. Every video includes one free retry. After you use it, further attempts use credits. Describing the change differently usually works better than repeating the same request. [Screenshot to come: the “This edit didn’t match your request” message with Try again, free and Leave it.] When an edit doesn’t match your request, you can try again or keep the result.Premium and Ultra
Requesting and reviewing an edit
Open the finished video and select Edit, or type your request in the project chat. Identify the scene or moment and describe the result you want, for example, “The ending feels abrupt. Hold on the finished loaf a little longer.” A finished Premium or Ultra video with Edit and Download controls and an editing deadline.
Review the proposed change and its credit estimate, then use the available confirmation controls to proceed or revise the request. An edit may regenerate affected clips or require the video to be assembled again. Wait for the updated video and check that it reflects your request before downloading.
A finished Premium or Ultra video with Edit and Download controls and an editing deadline.
Review the proposed change and its credit estimate, then use the available confirmation controls to proceed or revise the request. An edit may regenerate affected clips or require the video to be assembled again. Wait for the updated video and check that it reflects your request before downloading.
 The chat shows the proposed edit and its credit estimate.
The editing window
Premium and Ultra projects have a limited 30-day editing window. Complete your edits before it closes. Afterward, further editing is unavailable and the project may appear as Expired or Locked in Projects. The completed video remains available to watch and download.Reimagine
Reimagine is available on any finished Standard or Standard+ video. It creates a new version with a different style or an available mode option, while keeping the current video saved.- Open the finished video and choose Reimagine in the right-hand panel, beneath Download and Publish on Social.
- Choose a preset or saved style, or select Add style. The existing style is labeled Current. Adjust the mode using the options offered in the dialog.
- Review the settings and credit estimate on Regenerate, then confirm to create the new version.
 Choose the new style and available mode option, then review the Regenerate estimate.
Use the timeline editor above when you only want to change part of the video.
Choose the new style and available mode option, then review the Regenerate estimate.
Use the timeline editor above when you only want to change part of the video.
9. Credits, pricing and refunds
Generation pricing
These are the default generation rates. A custom model selection uses its displayed rate. Review the project estimate before generating; generation rates do not determine the cost of an edit.
Editing charges
Each edit has its own estimate based on the required work. In the Standard and Standard+ editor, the model, selected range, affected keyframes and transitions can change the cost. A preview uses credits before you apply it. Every generated edit is charged, including one that doesn’t match your request. Each video includes one free retry. New previews after that use credits. Discarding a completed preview does not reverse its generation charge. Applying it incorporates the result into your video; review any further processing estimate shown. Premium and Ultra edits also have separate estimates, and the original generation charge does not cover every later edit.Screenshots show examples of pricing. Each video includes one free retry; no other edits are free. Check your current estimate before proceeding.