> ## Documentation Index
> Fetch the complete documentation index at: https://help.opus.pro/llms.txt
> Use this file to discover all available pages before exploring further.
# Bulk Scheduler
You can now bulk schedule your clips directly from the results page.
1. **Navigate to your project**: Open your projects' results page.
2. **Select Clips**:
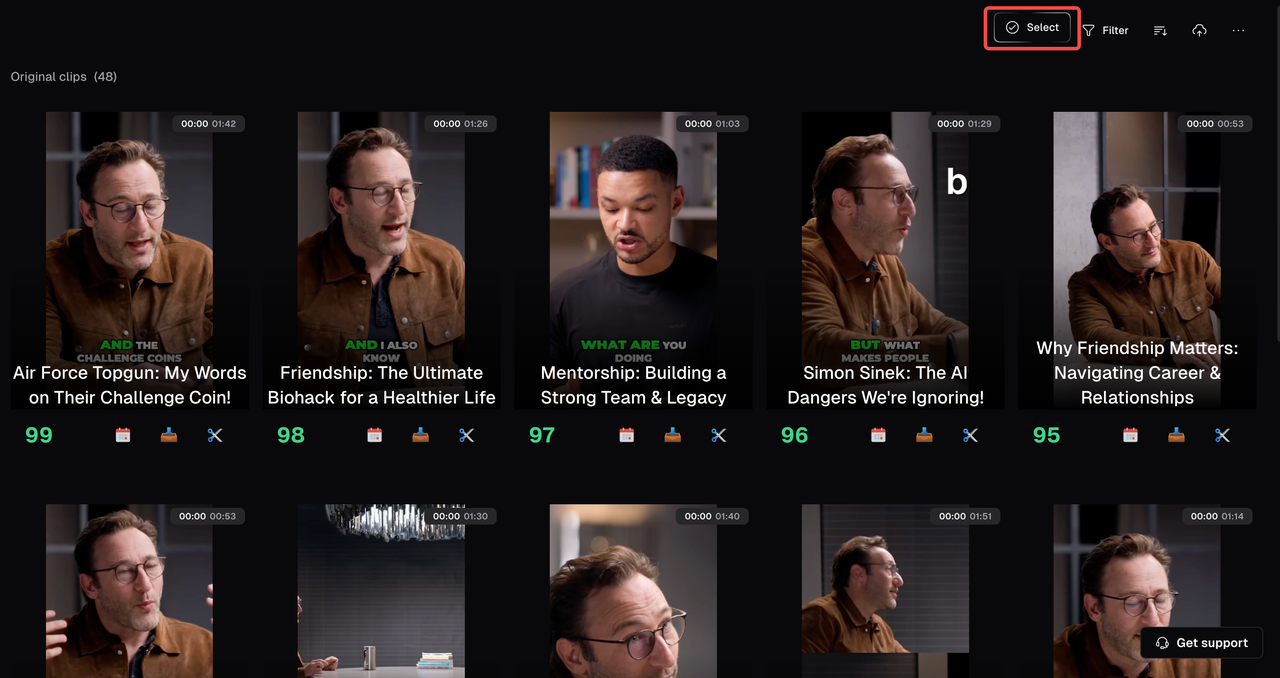
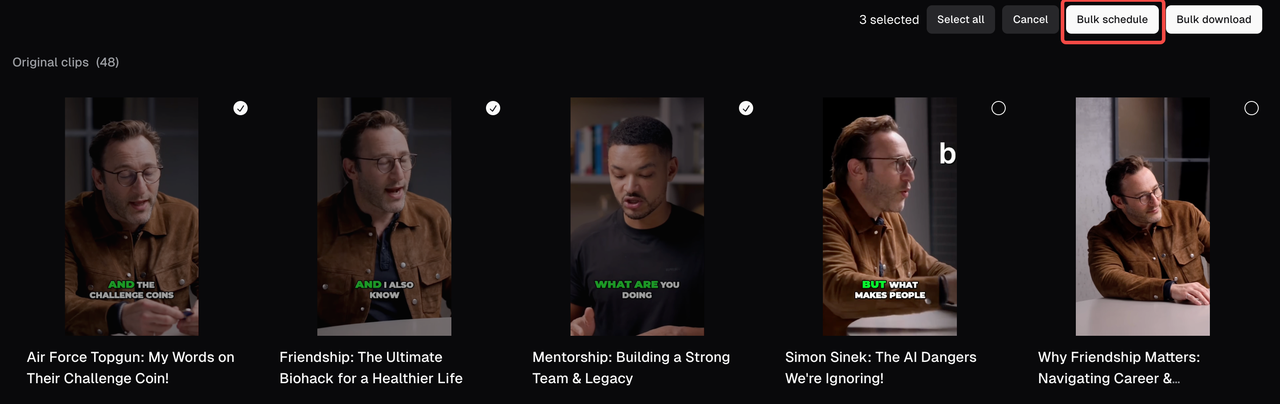
* Click on "**Select**" in the top right corner of the results page.
OR
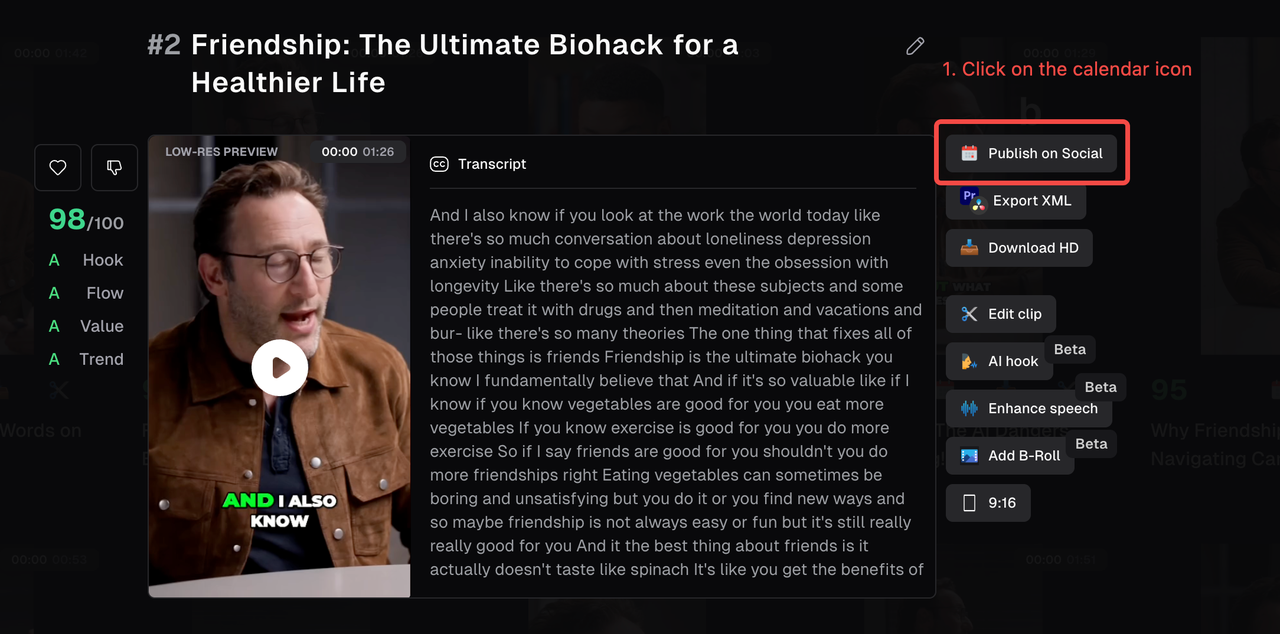
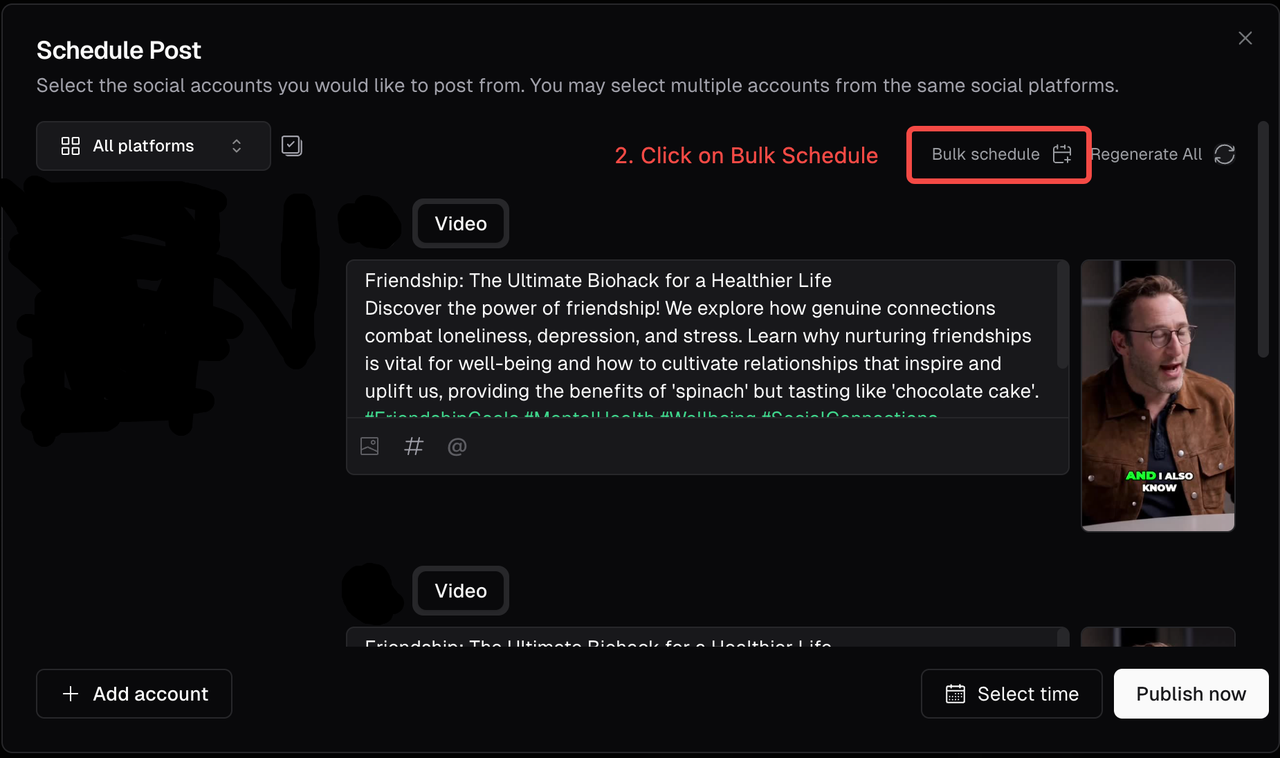
* Click on the **calendar icon** for a given clip and then click on "**Bulk Schedule**"
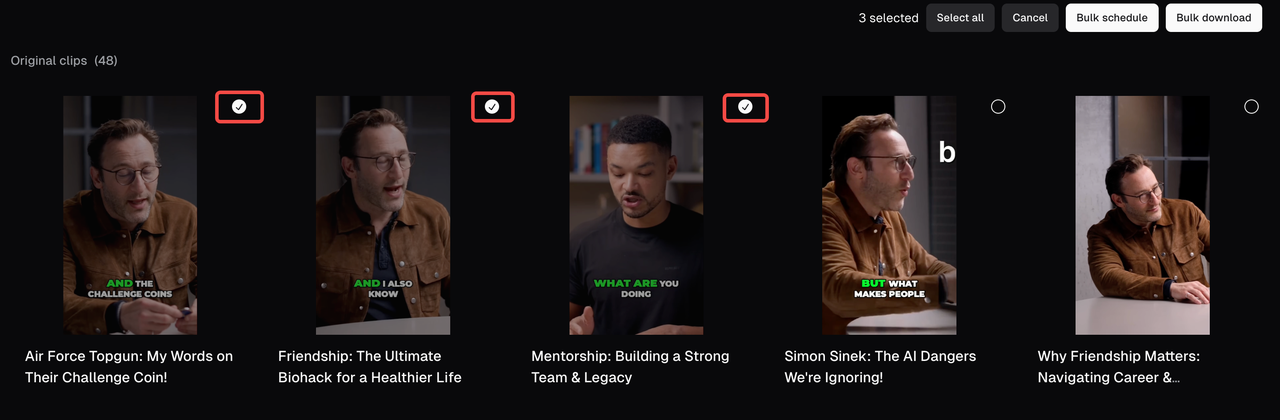
3. Check the box next to each clip to make your selection or use "**Select all**" to choose all clips at once
4. After choosing your clip, click on "**Bulk Schedule**" in the top right corner
5. **Configure your scheduling**: After selecting your clips, you'll now set when and how they will be published in bulk. This step defines the **posting order, start time, and frequency** — our AI will handle the rest.
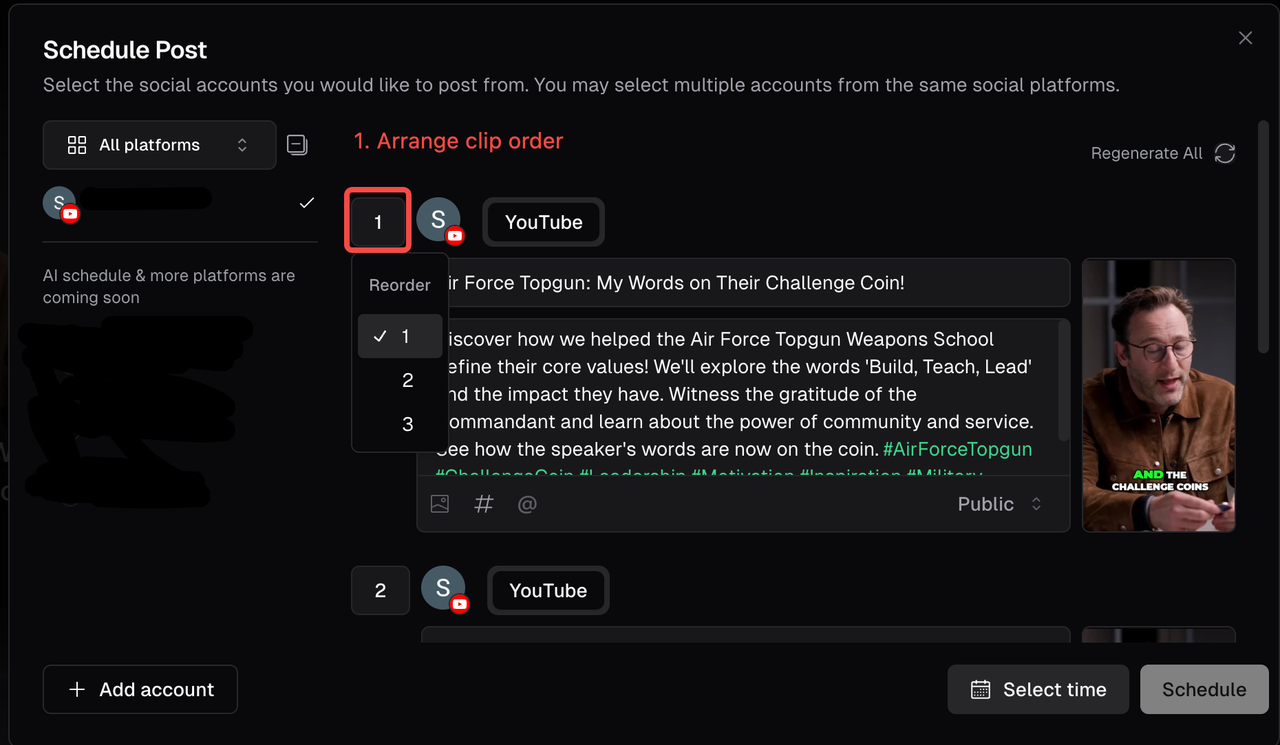
* **Arrange the clip order**: Manually assign the order: Click on the number next to each clip and enter its position in the posting sequence (e.g., 1 for the first clip, 2 for the second).
This number determines the exact order in which your clips will be published. For example: A clip marked "1" will go out first, a clip marked "2" will be posted next, and so on.
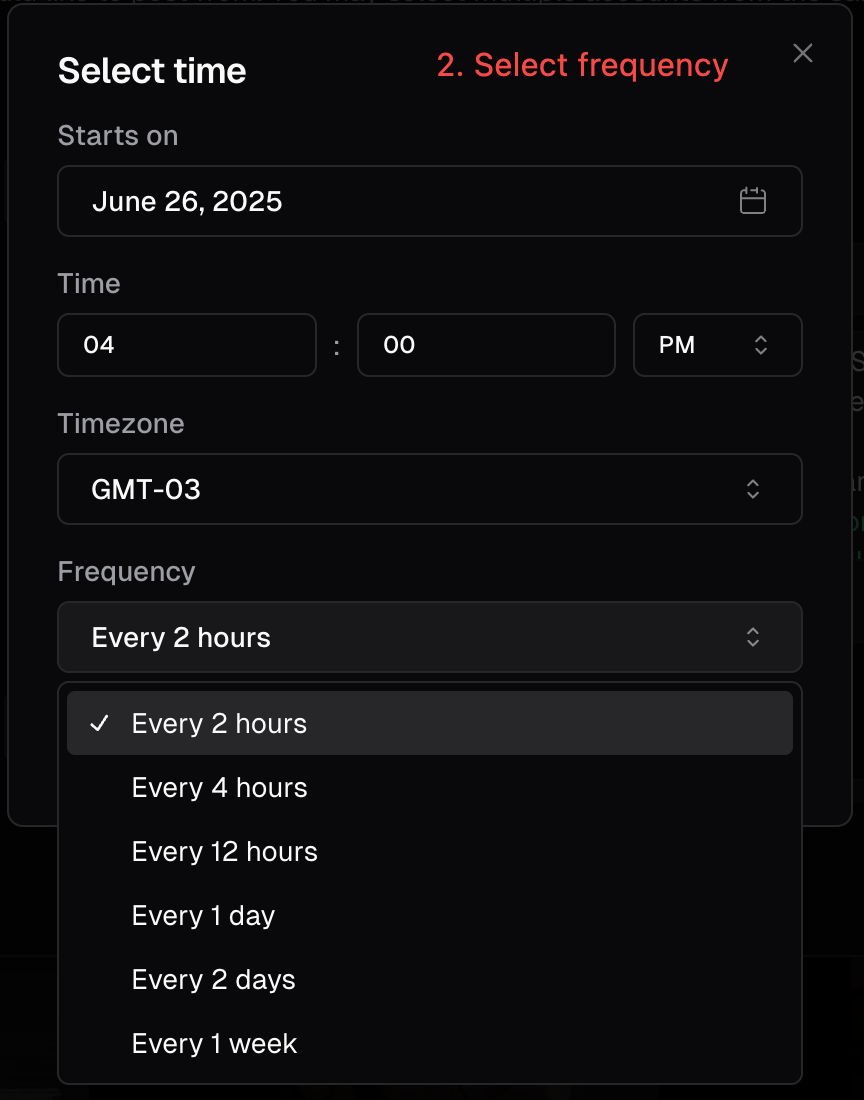
* **Set time & frequency**:
* Pick the date and time you want the first clip (order 1) to be published.
* Click of "**Frequency**" to define how often you want each clip to be published after the first one.
6. Our AI will automatically create:
* **Engaging descriptions**
* **Relevant hashtags**
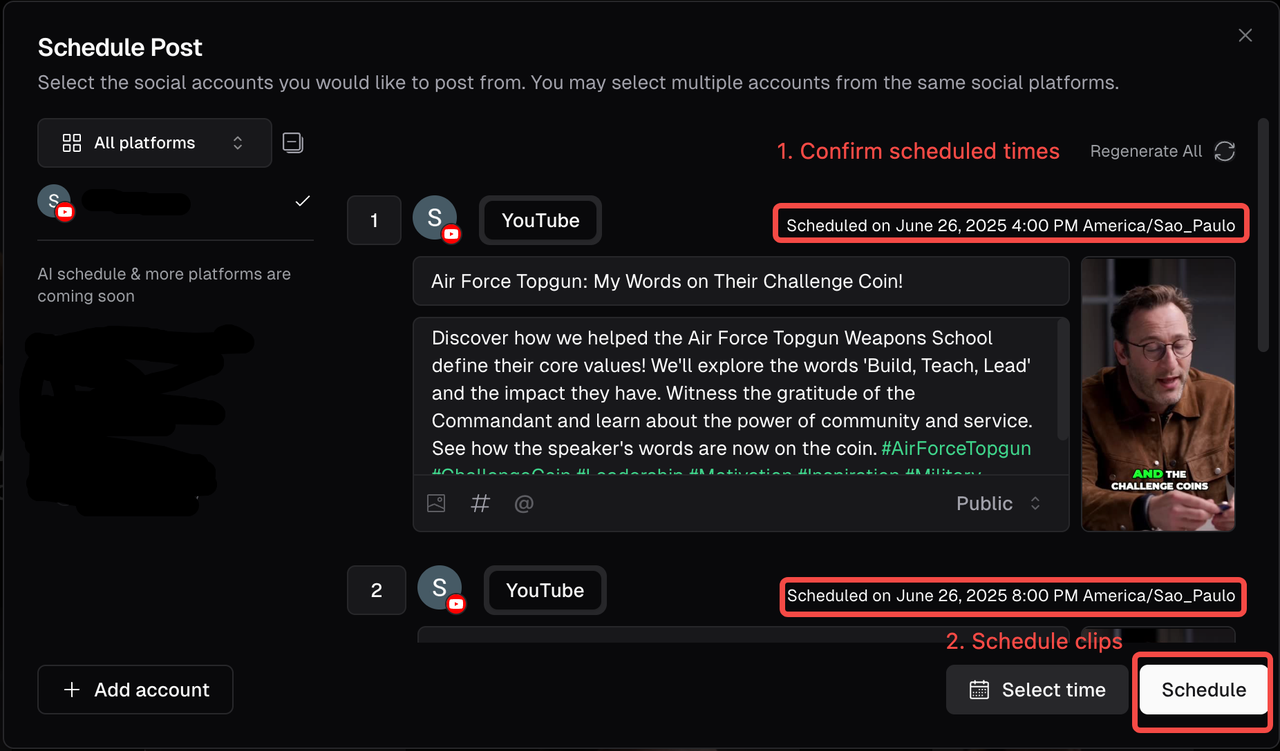
7. **Check schedule**: You can **preview times and edit captions**. Once you're happy with the order, start time, and frequency, click the “**Schedule**” button.
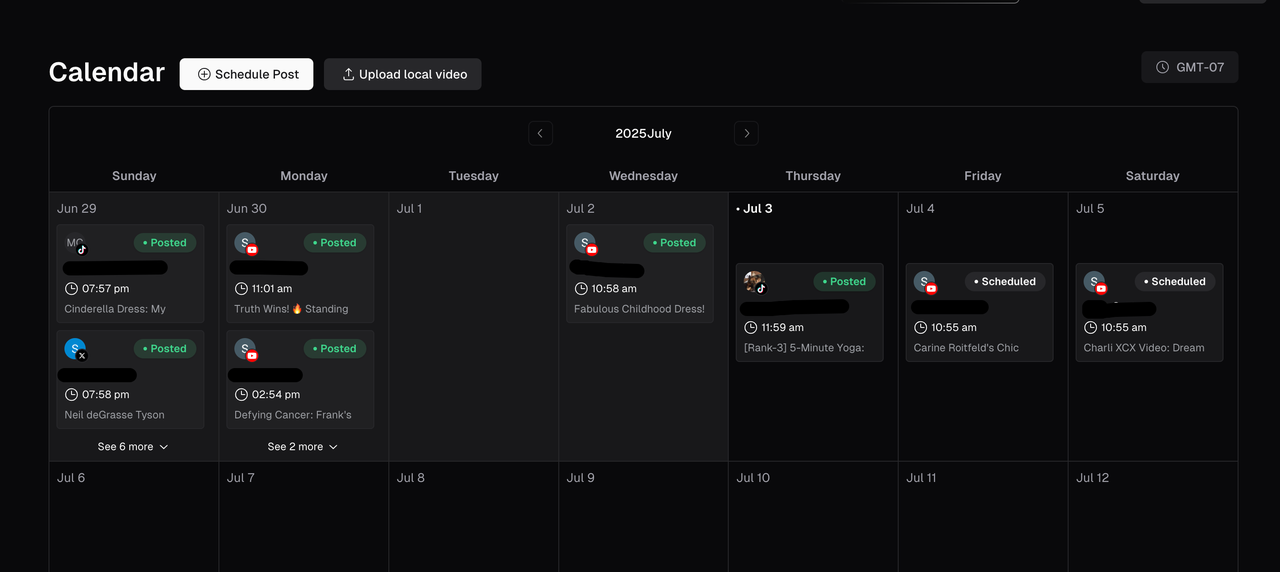
8. All your selected clips will now be **scheduled for automatic posting** in the order and timing you configured. To **review or make changes**:
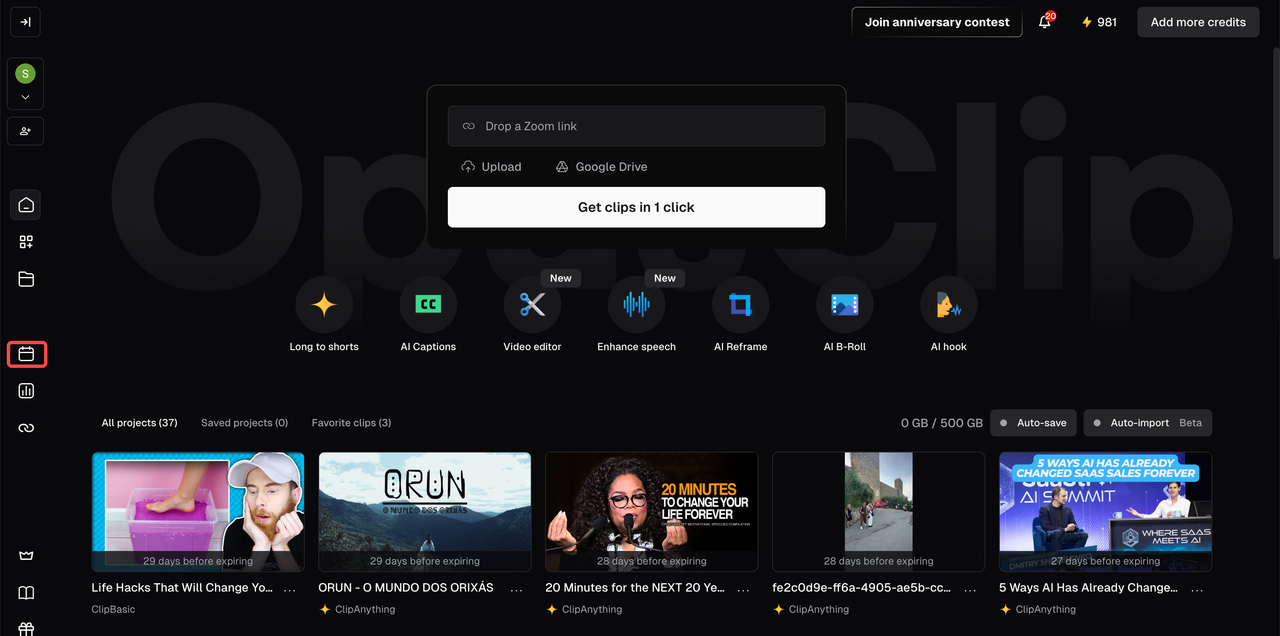
* Head to the **Calendar page** (accessible via the **left-hand thumbnail sidebar**).
* There, you can **view all scheduled posts, adjust posting times, reschedule or delete** any clip individually.
# FAQ
## Who can use the Bulk Scheduling feature?
This feature is **available exclusively to Pro users**. If you're on a Free, Trial or Starter plan you'll need to upgrade to access bulk scheduling.
## Which platforms are supported?
Currently, **Bulk Scheduling is only available for YouTube**. Support for additional platforms is coming soon!
## How does the posting frequency work?
You set a **fixed interval** (e.g., 2 hours , 4 hours, or daily), and clips will be scheduled **one after the other** based on the order you defined.
* The system follows your selected time interval **exactly**.
* **It does not skip weekends, holidays, or “ideal” posting times**.
* Example: If you schedule 5 clips and your first post starts at **Monday 9:00 AM** with a **2-hour interval**, the next clips will post at **10:00 AM (clip 2)**, **12:00 PM (clip 3)**, **2:00 PM (clip 4)**, **4:00 PM (clip 5)** — even across weekends or nights.
## Can I change the schedule after I’ve set it?
Yes. After scheduling, go to the **Calendar page** (via the left-hand sidebar) to:
* View your scheduled posts
* **Edit posting times**
* Reschedule or delete individual clips
## Can I schedule the same clip to post on multiple days?
Yes. However, each clip can be scheduled **once per session**. If you’d like to repost the same clip, you need to schedule it again.
## Can I bulk schedule to multiple platforms at once?
Not yet. At this time, **bulk scheduling supports YouTube only**. Posting to additional platforms is coming soon.
## Can I pause or cancel a scheduled post?
Yes. Visit the **Calendar page** (via the left-hand sidebar), find the clip, and:
* **Edit the time**
* **Delete the scheduled post**
* (Coming soon: pause/resume features)
## How many clips can I schedule at once?
There's no hard limit for Pro users.
## Do scheduled clips auto-publish even if I close the app?
Yes! Once scheduled, your clips will continue to be posted automatically — even if you close the browser, log out, or if your subscription expires.